Building a Continuous Delivery flow for your Infrastructure as Code.
> In this article, we’ll setup a continuous delivery for an infrastructure as code using Terraform. This is aimed at automating the provisioning of an infrastructure without need to run by hand.
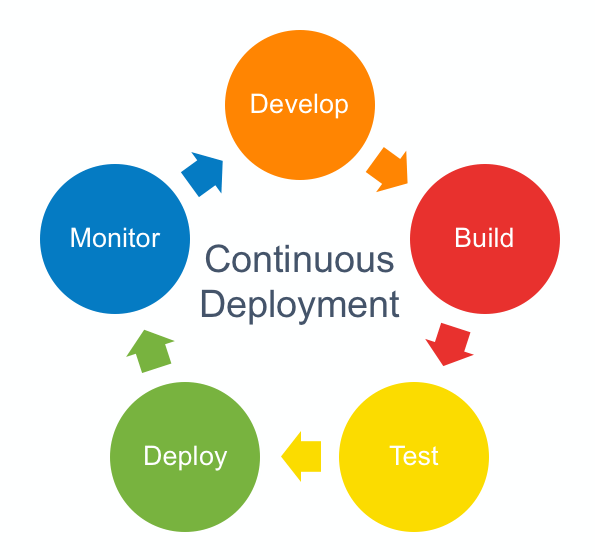
Continuous delivery is a strategy for software releases wherein any code commit that passes the automated testing phase is automatically released into the production environment, making changes that are visible to the software’s users.
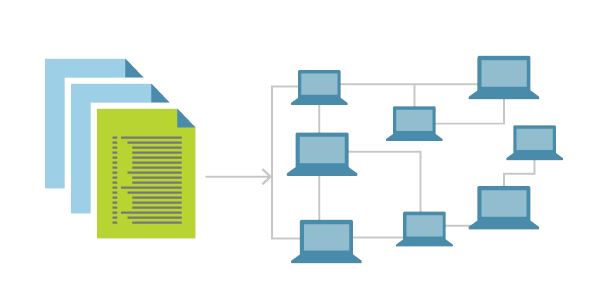
Infrastructure as Code (IaC) is the approach that takes proven coding techniques used by software systems and extends them to infrastructure. It is one of the key DevOps practices that enables teams to deliver infrastructure rapidly, reliably and at scale, and thereby, also software running on that infrastructure.
IaC makes your change control processes simpler because non-technical people see changes when they happen. Just like we can use automated testing to ensure our architecture works, we can easily set up new systems to manually test code as well.
While the primary goal of Continuous Delivery (CD) is to ensure that the software can be reliably released at any time and integrating IaC as part of the CD pipeline helps in achieving that goal.
In this article we would use Terraform to setup our Infrastructure as Code.
## Introducing Terraform

Deployment and infrastructure management isn’t a simple process. On top of a lot of ever-changing, domain expertise we need to learn Yet Another Tool or a new workflow. If you have been putting this off, this article is a chance for you go get acquainted with one approach to infrastructure management. I hope in the end you will be more confident in using Terraform and know more about the possible approaches and challenges. You should be able to use this tool to at least start managing some part of your cloud infrastructure.
Terraform is platform-agnostic; you can use it to manage bare metal servers or cloud servers like AWS, Google Cloud Platform, OpenStack, and Azure. In Terraform lingo, these are called providers, You can get a sense of the scale by reading a full list of supported providers.
**Writing Terraform Configuration**

You write Terraform configuration code in `*.tf` files using the HCL language. There is an option to use JSON format (`*.tf.json`), but it’s targeted at machines and auto generation rather than humans. I recommend that you stick with HCL. I won’t dive deep into the syntax of HCL language; the official docs do a fantastic job of describing how to write HCL and how to use variables and interpolations. I’ll only mention the bare minimum needed to understand the examples.
Inside Terraform files, you are mostly dealing with resources and data sources. Resources represent components of your infrastructure, e.g., a VM instance, an RDS instance, a DNS record, or a rule in a security group. Terraform allows you to provision and change on a cloud provider.
**Terraform Structure**
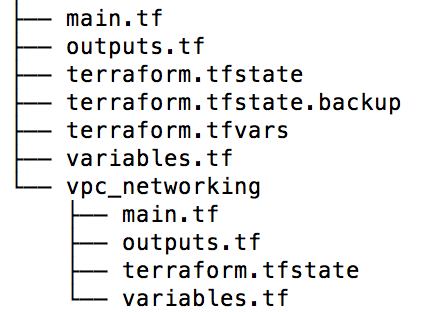
Terraform uses a specialised programming language for defining infrastructure, called Hashicorp Configuration Language (HCL). HCL code is typically stored in files ending with the extension `tf`. A Terraform project is any directory that contains `tf` files and has been initialized using the `init` command, which sets up Terraform caches and default local state.
Terraform state is the mechanism via which it keeps track of resources that are actually deployed in the cloud. State is stored in backends — locally, on disk, or remotely, on a file storage cloud service or specialized state management software, for optimal redundancy and reliability. You can read more about different backends in the Terraform documentation.
Project workspaces allow you to have multiple states in the same backend, tied to the same configuration. This allows you to deploy multiple distinct instances of the same infrastructure. Each project starts with a workspace named `default` — this will be used if you do not explicitly create or switch to another one.
Modules in Terraform (akin to libraries in other programming languages) are parametrized code containers enclosing multiple resource declarations. They allow you to abstract away a common part of your infrastructure and reuse it later with different inputs.
A Terraform project can also include external code files for use with dynamic data inputs, which can parse the JSON output of a CLI command and offer it for use in resource declarations. In this tutorial, we would use a Cloud Init external file to provision packages on our infrastructure.
**Backend Configuration**

Each Terraform configuration has an associated backend that defines how operations are executed and where persistent data such as the Terraform state are stored.
The persistent data stored in the backend belongs to a workspace. Initially the backend has only one workspace, called “default”, and thus there is only one Terraform state associated with that configuration.
Backends are configured directly in Terraform files in the `terraform` section. After configuring a backend, it has to be initialized.
When configuring a backend for the first time (moving from no defined backend to explicitly configuring one), Terraform will give you the option to migrate your state to the new backend. This lets you adopt backends without losing any existing state.
To be extra careful, we always recommend manually backing up your state as well. You can do this by simply copying your `terraform.tfstate` file to another location. The initialization process should create a backup as well, but it never hurts to be safe!
Configuring a backend for the first time is no different than changing a configuration in the future: create the new configuration and run `terraform init`. Terraform will guide you the rest of the way.
**Terraform Providers**

Terraform is used to create, manage, and update infrastructure resources such as physical machines, VMs, network switches, containers, and more. Almost any infrastructure type can be represented as a resource in Terraform.
A provider is responsible for understanding API interactions and exposing resources. Most providers configure a specific infrastructure platform (either cloud or self-hosted). Providers can also offer local utilities for tasks like generating random numbers for unique resource names.
Every Terraform provider has its own documentation, describing its resource types and their arguments.
The Terraform Registry is also the main home for provider documentation. When viewing a provider’s page on the Terraform Registry, you can click the “Documentation” link in the header to browse its documentation. Provider documentation in the registry is versioned, and you can use the dropdown version menu in the header to switch which version’s documentation you are viewing.
## Continuously Delivering using Semaphore with Terraform’s Workflow
We’ll be using Semaphore CI for setting up a continuous delivery flow with Terraform’s Infrastructure as Code configurations.
The core Terraform workflow has three steps:
1. Write — Author infrastructure as code.
2. Plan — Preview changes before applying.
3. Apply — Provision reproducible infrastructure.
Our Semaphore CI code executes each step as seen in the following codes:
version: v1.0
 name: Terraform IaC
 agent:
 machine:
 type: e1-standard-2
 os_image: ubuntu1804
 global_job_config:
 env_vars:
 — name: BUILD_TOOLS_VERSION
 value: v0.1.2
 — name: TF_IN_AUTOMATION
 value: ‘yes’
 — name: TERRAFORM_PLANFILE
 value: out.tfplan
 — name: TERRAFORM_DIR
 value: gce_vm_cloudinit
 secrets:
 — name: secrets
 prologue:
 commands:
 — checkout — use-cache
 blocks:
 — name: Lint and Plan
 task:
 prologue:
 commands:
 — cache clear
 jobs:
 — name: Pre Commit Hooks
 commands:
 — make pre-commit-hooks
 — name: Terraform Plan
 commands:
 — cp ~/.secrets/gcp_sa.json $TERRAFORM_DIR/sa.json
 — touch $TERRAFORM_PLANFILE
 — make terraform-init
 — make terraform-plan
 — cache store terraform-wd-$TERRAFORM_DIR .terraform
 — cache store terraform-planfile-$TERRAFORM_DIR $TERRAFORM_PLANFILE

 promotions:
 — name: IaC-Github Deploy to GitHub
 pipeline_file: deploy.yml
 auto_promote:
 when: branch = ‘master’
The code above performs the Terraform init and Terraform plan stages on any branch, however this does not perform Terraform apply, this is restricted to commits made to master branch as seen below:
version: v1.0
 name: Apply Terraform Changes
 agent:
 machine:
 type: e1-standard-2
 os_image: ubuntu1804
 global_job_config:
 env_vars:
 — name: BUILD_TOOLS_VERSION
 value: v0.1.2
 — name: TF_IN_AUTOMATION
 value: ‘yes’
 — name: TERRAFORM_PLANFILE
 value: out.tfplan
 — name: TERRAFORM_DIR
 value: gce_vm_cloudinit
 secrets:
 — name: secrets
 prologue:
 commands:
 — checkout — use-cache
 blocks:
 — name: Deploy Master
 task:
 prologue:
 commands:
 — cp ~/.secrets/gcp_sa.json $TERRAFORM_DIR/sa.json
 — touch $TERRAFORM_PLANFILE
 — cache restore terraform-wd-$TERRAFORM_DIR
 — cache restore terraform-planfile-$TERRAFORM_DIR
 jobs:
 — name: Terraform Apply
 commands:
 — make terraform-apply
 — cache clear
If you are new to Terraform, you can read up on Semaphore CI tutorials here. Also ensure to add required secrets as seen in the screenshot below.
The above CD configuration can be written to support other CI/CD tools, just the Terraform workflow is adhered to.
**Working with an example locally**
To make this tutorial easier to understand, I made a sample demo that can be cloned from [GitHub](https://github.com/Timtech4u/iac-cd-sample.git).
# Clone repo
 $ git clone https://github.com/Timtech4u/iac-cd-sample.git

 # Change directory
 $ cd iac-cd-sample/gce_vm_cloudinit

 # Initialize Terraform
 $ terraform init

 Initializing provider plugins…
 # …
 Terraform has been successfully initialized!

 # Review plan
 $ terraform plan

 # Apply
 $ terraform apply

 An execution plan has been generated and is shown below.

 Do you want to perform these actions?

 Terraform will perform the actions described above.
 Only ‘yes’ will be accepted to approve.
 Enter a value: yes

 # …

 Apply complete! Resources: 1 added, 0 changed, 0 destroyed.
Once you verify your Infrastructure as Code works properly, you can integrate with a CI/CD tool to enable you continuously deliver your infrastructure.
Thanks for reading!
